HOW TO: HID low beam install (with pics) - Pontiac GTO Forums: Pontiac GTO Forum
NewAge GTO Forums


Go Back   Pontiac GTO Forums: Pontiac GTO Forum > GTO Tech > Appearence/Ground Effects/Wheels

Newagegto.com is the premier Pontiac GTO Forum on the internet. Registered Users do not see the above ads.
Reply
 
Thread Tools
Old 11-14-2008, 04:00 PM   #1
justin-branam
 
Join Date: Nov 2008
Posts: 3
HOW TO: HID low beam install (with pics)

Put this up on some other forums, and it helped a few people out, so here you go.

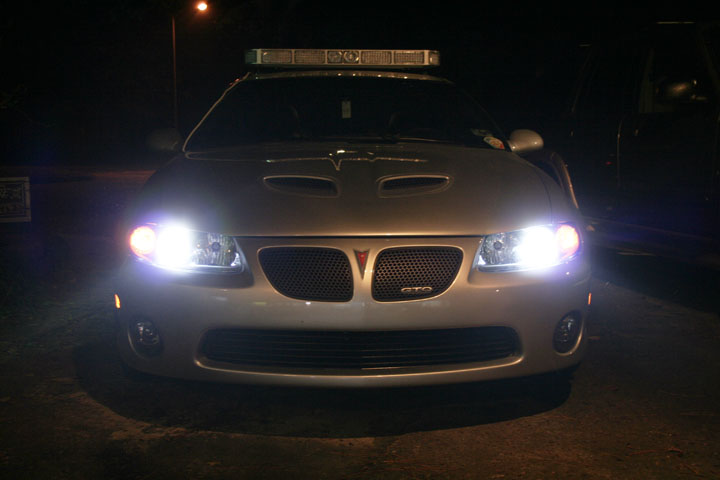
I just finished installing my HID's. It was an eBay kit i got for $63 shipped (kit seen HERE at amazon for $120). Brand is Xentec and I got the 5000K bulbs and am glad i did since they are still a tad bit on the blue side. The install was a breeze and took about an hour. I also pulled my DRL relay for now so they dont run during the day. If i find out how to make the fogs my DRL's, I'll let everyone know.

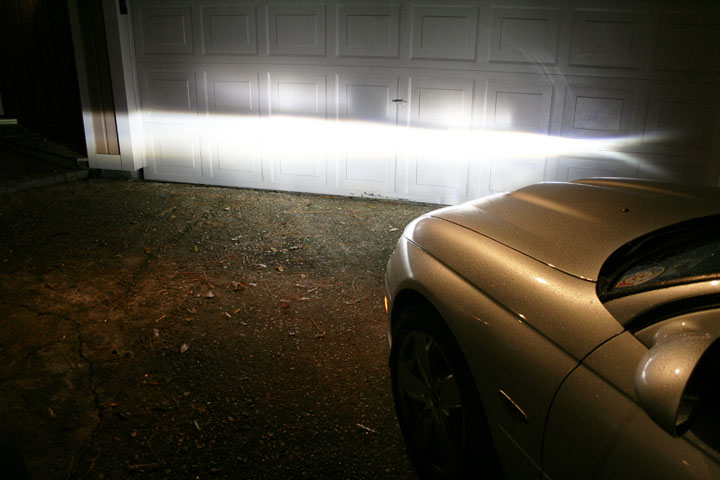
*after an hour+ road trip, I'd have to say these HID's are just as nice as my buddy's stock corvette HID's.

Here is a step by step install with pictures for the XenTec HID Kit
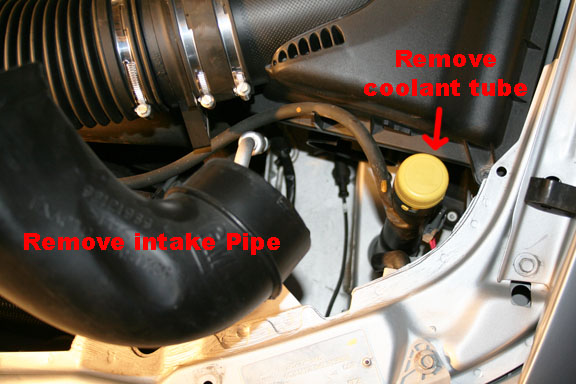
Step 1: For the driver’s side, remove the intake pipe and coolant tube to access the bulb (if you have large hands you will probably have to remove the entire air box).


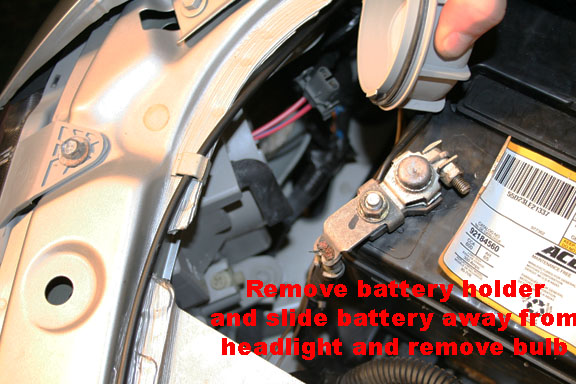
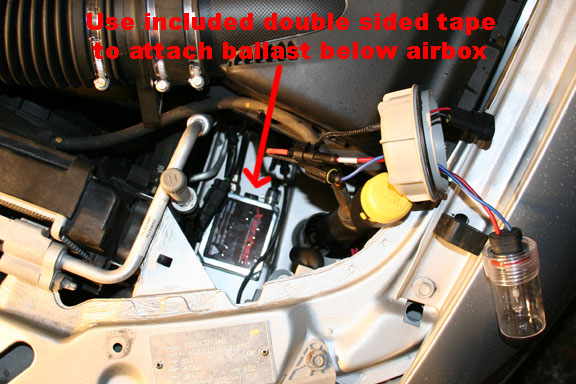
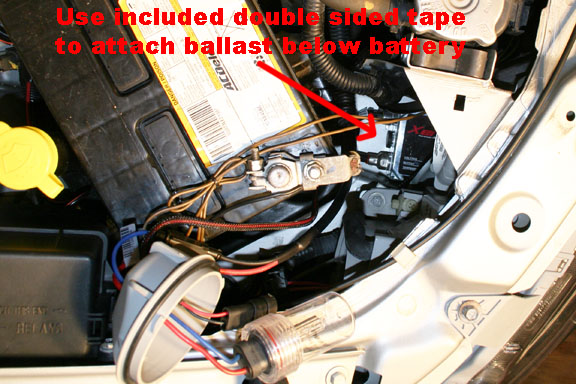
Step 1a: For the passenger side, remove the battery holder clip and slide the battery towards the engine to access the bulb (if you have large hands you will probably have to remove disconnect and remove the battery).


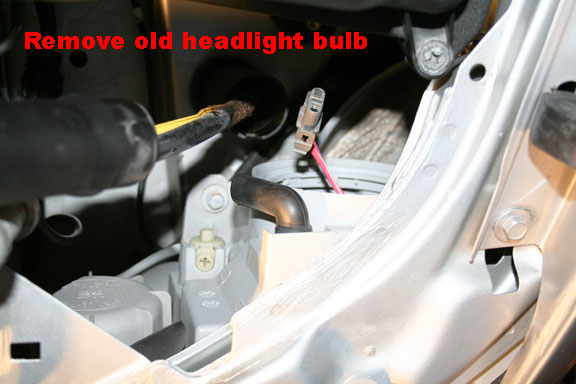
Step 2: Remove the original bulbs (you can see the radiator tube moved out of the way).


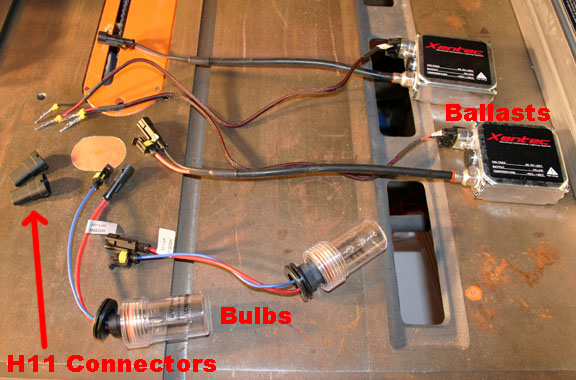
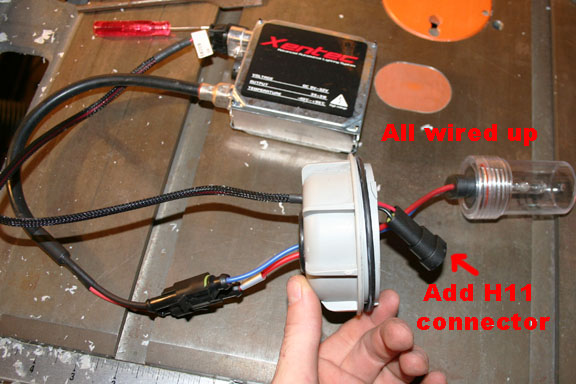
Step 3: Not really a step, just showing all of the components in the HID kit


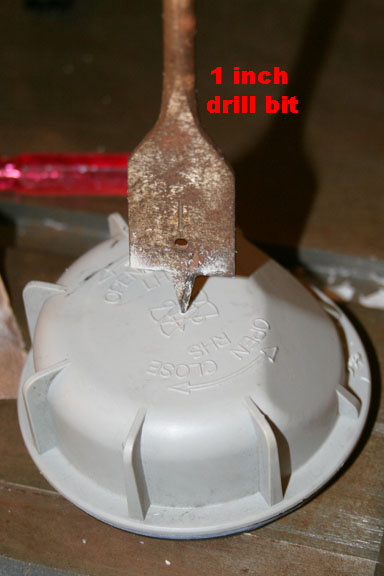
Step 4: Drill a 1 inch hole in each of the headlight bulb caps as shown.


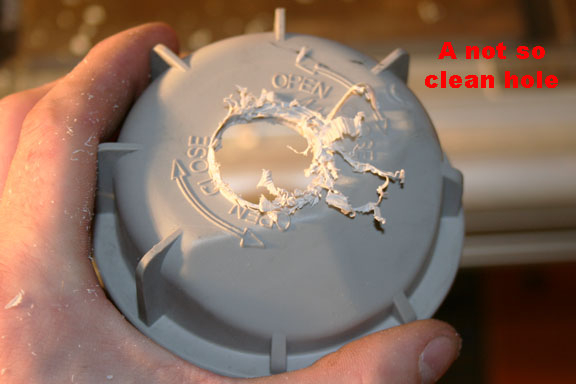
Step 4a: Again, not a step, just showing the drilled hole.


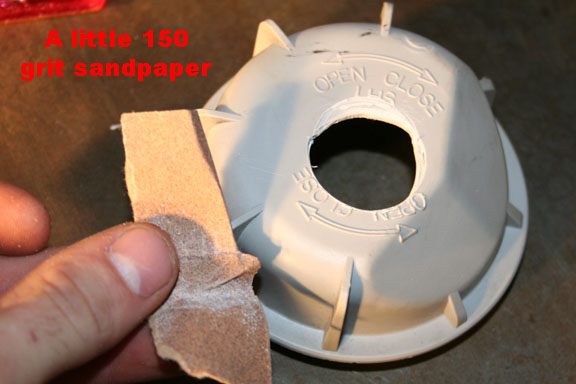
Step 5: Use some sand paper to clean up the edges of the hole, so the grommet gets a nice snug fit.


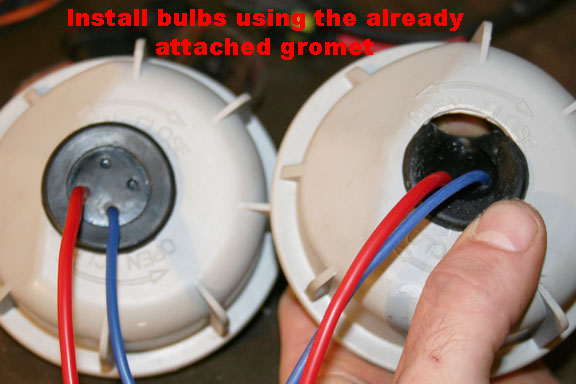
Step 6: Insert the bulb and work the rubber grommet onto the headlight bulb cap. With this step you need to decide if you want to remove the plastic protective case from around the bulb now, or do what I did, and just break it off when you’re ready to install the bulb. I preferred to have the bulb protected as long as I could. If you do remove it now DO NOT TOUC THE BULB. Also, don’t let any grease or oils or anything else get on the bulb.


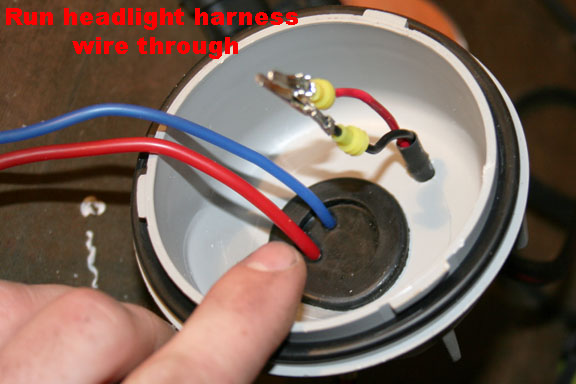
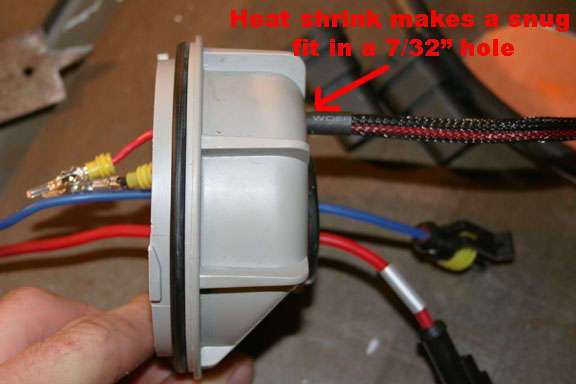
Step 7: You will then need to drill a 7/32” hole through the headlight bulb cap. This will be for the H11 connector wires. You need to insert them in one at a time and you may need a small flathead to “urge” the watertight seals to go through the hole.

justin-branam is offline   Reply With Quote
Sponsored Links
Advertisement
 
Old 11-14-2008, 04:00 PM   #2
justin-branam
 
Join Date: Nov 2008
Posts: 3
Step 8: When you have both wires run through, pull until the heat-shrinked part goes into the hole. This will help to create a mostly watertight seal.


Step 9: Now you can add the H11 connector to the clips. Make sure you wire them up the correct way. The black wire needs to go to the headlight wire with the white stripe. The red wire goes to the blue stripe. If you do connect them up wrong it won’t hurt anything, the bulbs just won’t light.


Step 10: For the driver’s side, use the included double-sided sticky tape to mount the ballast. I mounted it under the air box tube. There is a nice space that looks like it was meant for the ballast. Be sure to wipe the metal clean first. I also used some rubbing alcohol to help clean any oils off the metal.


Step 10a: For the passenger’s side, use the included double-sided sticky tape to mount the ballast. I mounted it under the battery. Again, there is a nice space that looks like it was meant for the ballast. Clean as stated in the previous step.


Lastly, you can remove the plastic protector from the bulb DO NOT TOUCH THE BULB and insert it into the bulb socket. You will also need to connect the H11 connector at this time. Then put the cap headlight bulb cap back on. I gently pulled the slack out of the bulb wires as I did this so they didn’t get caught in the gap when putting the cap back on. Now just tuck the wires in nicely, replace the battery, air intake tube and radiator tube and enjoy your new lights.

Note: I removed the relay for the DRL’s to lessen the hours on the HID bulbs. I also increased the delay for the lights to stay on when you unlock the car, to 45 seconds. This will help to prevent them from cutting on and back off before you start the car, which will help reduce wear on the bulbs and ballasts.

Finished Product:


justin-branam is offline   Reply With Quote
Old 11-14-2008, 06:09 PM   #3
mechanic58
Banned
 
Join Date: Feb 2005
Location: USA
Posts: 1,236
WTF is that on the roof of your car man? Don't tell me you're runnin a wide load escort business with your GTO.
mechanic58 is offline   Reply With Quote
 
Old 11-15-2008, 01:27 AM   #4
justin-branam
 
Join Date: Nov 2008
Posts: 3
Quote:
Originally Posted by mechanic58
WTF is that on the roof of your car man? Don't tell me you're runnin a wide load escort business with your GTO.
emergency lightbar = firefighter. its kind of big, but thats what my department requires.
justin-branam is offline   Reply With Quote
Old 11-15-2008, 10:42 AM   #5
mechanic58
Banned
 
Join Date: Feb 2005
Location: USA
Posts: 1,236
Holy dork **** batman....lol.. That's the most ridiculous thing I have ever seen.
mechanic58 is offline   Reply With Quote
Sponsored Links
Advertisement
 
Reply


Currently Active Users Viewing This Thread: 1 (0 members and 1 guests)
 
Thread Tools

Posting Rules
You may not post new threads
You may not post replies
You may not post attachments
You may not edit your posts

BB code is On
Smilies are On
[IMG] code is On
HTML code is Off

Forum Jump

Powered by vBadvanced CMPS v3.2.2

All times are GMT -5. The time now is 02:39 PM.


Powered by vBulletin®. Copyright ©2000 - 2024, Jelsoft Enterprises Ltd.
vBulletin Security provided by vBSecurity v2.2.2 (Pro) - vBulletin Mods & Addons Copyright © 2024 DragonByte Technologies Ltd.